Instant flows can be tricky. They are great at on-demand actions which need to be run manually, or, more precisely, when someone explicitly does something (like presses a button in a Power App, or calls the flow from Power Virtual Agents). However, they differ from automated flows in that automated flows usually trigger when something happens, but as a result of that event happening (e.g. when a row is added to a Dataverse table, for example). What this means is that, for automated flows, the creator can use their own credentials (or, better practice, that of a service principal or service account) to carry out the actions within that flow; the event which triggers the flow can be by anyone or anything. But with instant flows, the default credentials used will be that of the triggering user.
This means that, for each action within your flow, the triggering user needs to provide their credentials to the services or APIs being used by these actions. This can cause problems when, let’s say, you need your flow users to be able to run the flow but, for example, licensing to the ‘end system’ may be limited due to cost or availability. What if your users don’t have access or, in some cases, even can’t have access to the actions; maybe due to licensing costs or data protection? So, how can we allow our users to trigger an instant flow but use the credentials of the flow designer/service account, and not ask the user for login details which they probably don’t have?
Welcome to child flows!

Think of the typical parent-child relationship, in terms of entity relationships. There is a parent element which instructs, or controls, a child element. It’s the same principle here. One parent flow instructs a child flow as one of it’s actions, and returns the success of the child flow to the parent; in addition, it can return other useful information into the parent flow from the child flow.
All the steps laid out in this walkthrough MUST be completed from within a solution; child flows are solution aware and cannot be added to solutions if created outside of a solution initially. You have been warned 😉. With this said, let’s take a look at this in practice.
First, let’s create the child flow. This should contain all the actions which you want to be executed as part of your parent flow (we’ll come to this bit later), but with three key elements:
- The trigger should be “Manually trigger a flow”
- The actions must end with the action “Respond to a PowerApp or flow”.
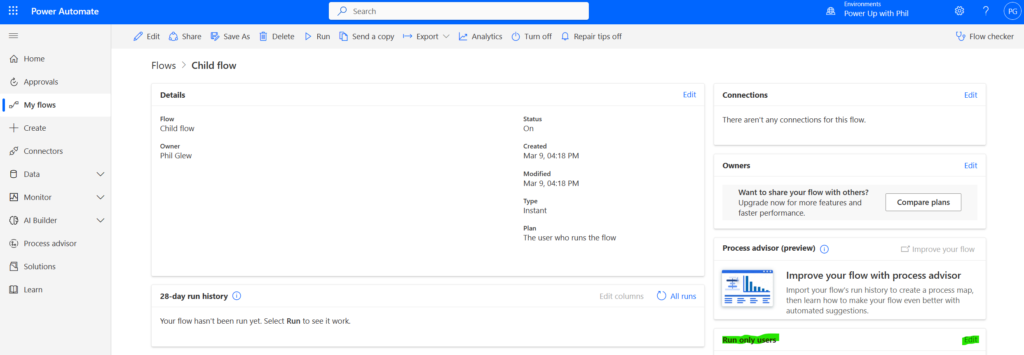
- When you’ve created your child flow, go to it’s details page (where you see the Details, Run history, Connections etc) and add the people/AAD Group that you want to be able to run this flow, but ONLY run it; not connect via it. Simply run it. Don’t also forget to change the connection drop-downs to “Use this connection (the name of the connection you created, this could just be your username)” instead of “Provided by run-only user”. See the image below.

It goes without saying that both flows need to be within the same environment, and, critically, they must be within the same solution (just to reiterate!). So, all you’ve done here really is created a flow, but allowed others to run it, kind of ‘on your behalf’.
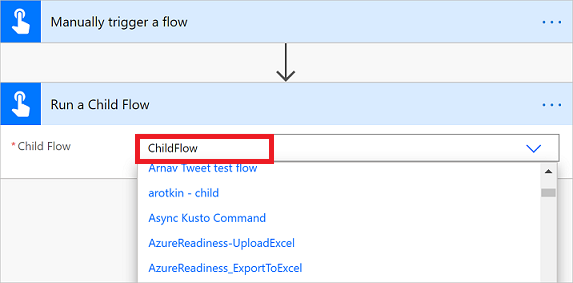
Next, create your ‘parent’ flow; this can have any trigger you like, just ensure that the ‘sensitive’ or limited’ actions for your users are all within your child flow, and not your parent flow. At the right point where you need to call the child flow actions, user the action “Call a Child Flow” and select your child flow from the drop-down list. That’s it, give it a spin. You will see the parent flow trigger the child flow automatically and, when the child flow is complete, it will respond to the parent flow which then, if you have any, will go on to complete any subsequent actions.
Parent-child flow solutions should be well-tested as, if the child flow hangs to complete for any reason, so will the parent flow.
Happy flowing!


